Exporting UI assets from screen mock-ups can be messy, so a while ago, I devised a process to simplify it. It helps limit human error in the exporting process and speed things up by automating a lot of it. I’ve used it to track and update assets easily, ensuring nothing is missed and also for simplifying future exports for any necessary changes.
What we are going to do in this tutorial is make a UI atlas of all our UI assets, create slices of them and then export them. Additionally, we will explore ways to upscale the assets for different pixel densities.
Creating the export atlas
Gathering images
Bring all the individual assets into one “atlas” within a single PSD, or for larger UIs, consider using multiple atlases of one per screen.
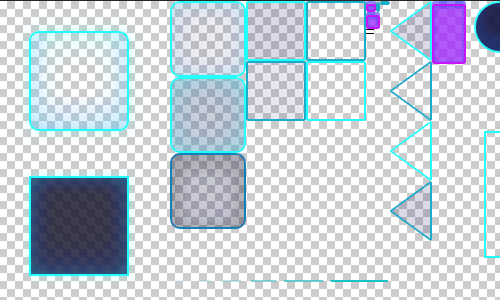
- Scale down any stretchable assets to save space in the actual UI atlas.
- The export atlas doesn’t have to be tightly packed, later on we can trim out all the excess transparent pixels. However, organizing assets with no faded edges closely together will make slicing cleaner.
- For assets requiring consistent sizes (e.g., different button states), maintain uniform dimensions, including transparent edges.
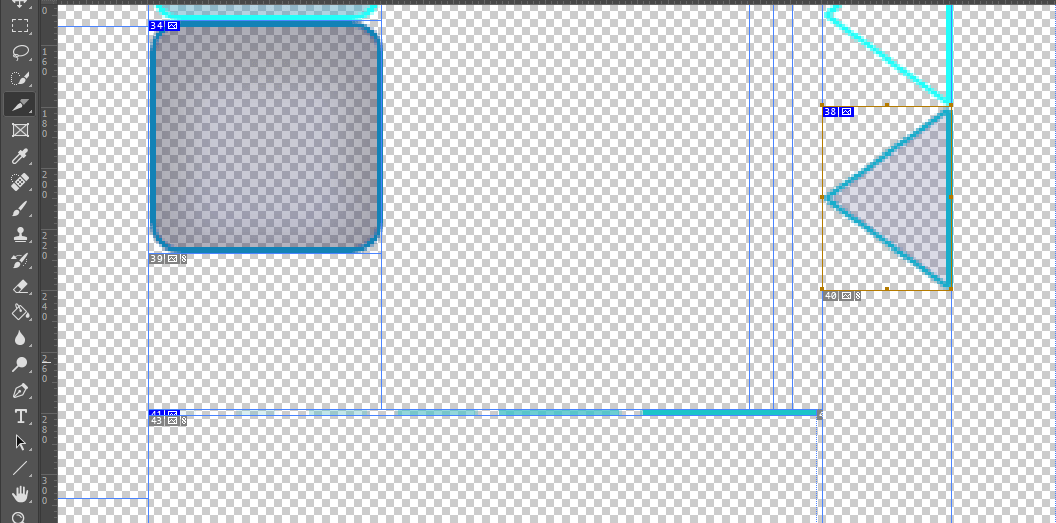
- For assets like panel sections, import the entire asset and use the slice tool to extract the needed part.
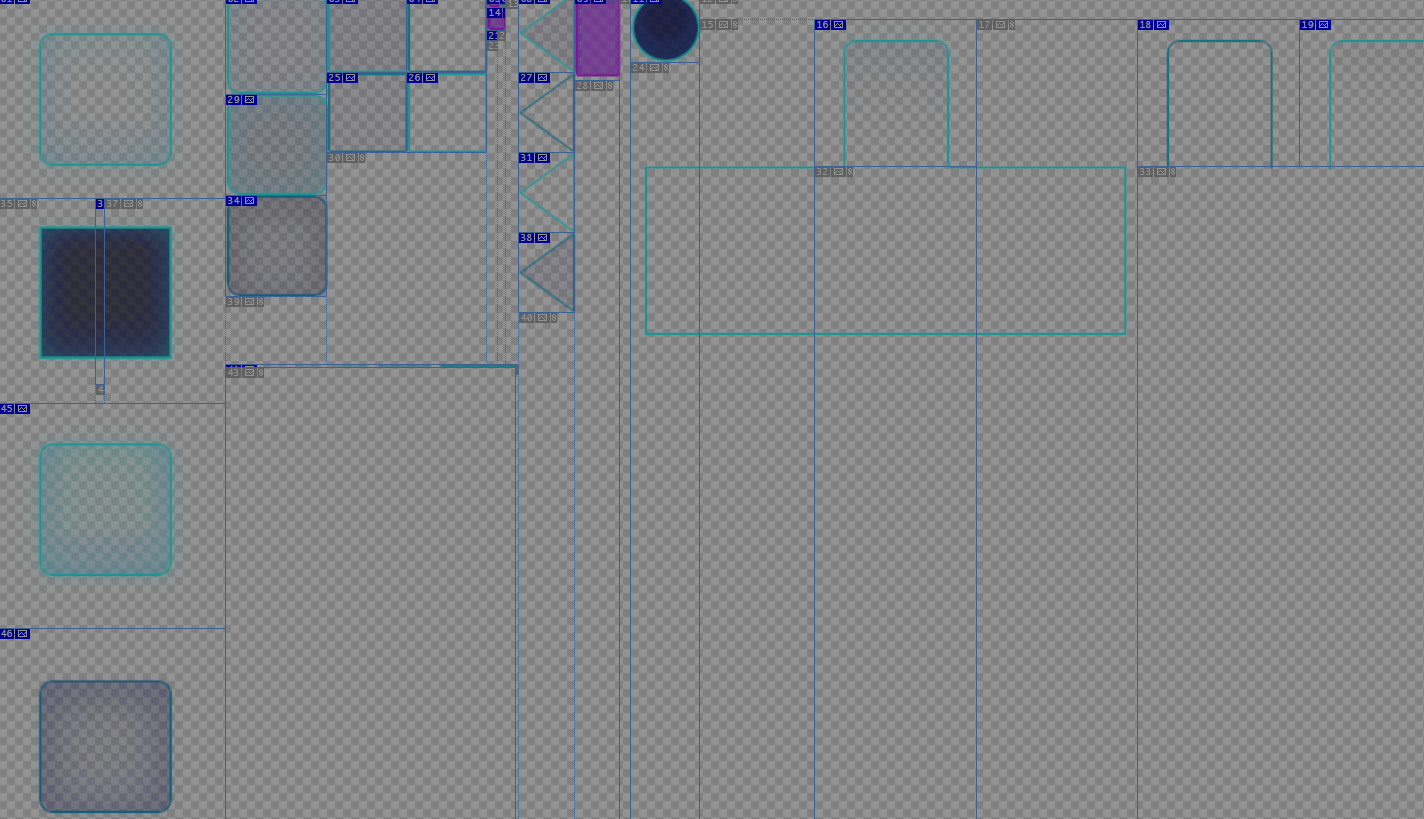
Making slices
- Use the slice tool to make rectangles around each asset or the piece you need to export.
- When all slices are made, use the slice selection tool to name each slice by double clicking the slice and opening the above panel. This name will later be used for the asset’s filename during export.

Save for Web
Now we need to export all the slices using Save for Web
- Go to File > Export > Save for Web (legacy) or File > Save for Web if using an older Photoshop
Setting the slices to save as PNG
You may have issues where the exported slices will save in an improper format like jpg or gif, the following steps are the best way I’ve found to solve that:
- Zoom out in the dialog until you can see all your slices.
- Use the slice selection tool and click and drag a selection around all slices in the little preview image.
- Set the preset to PNG-24 with transparency enabled and then click Done to save these settings.
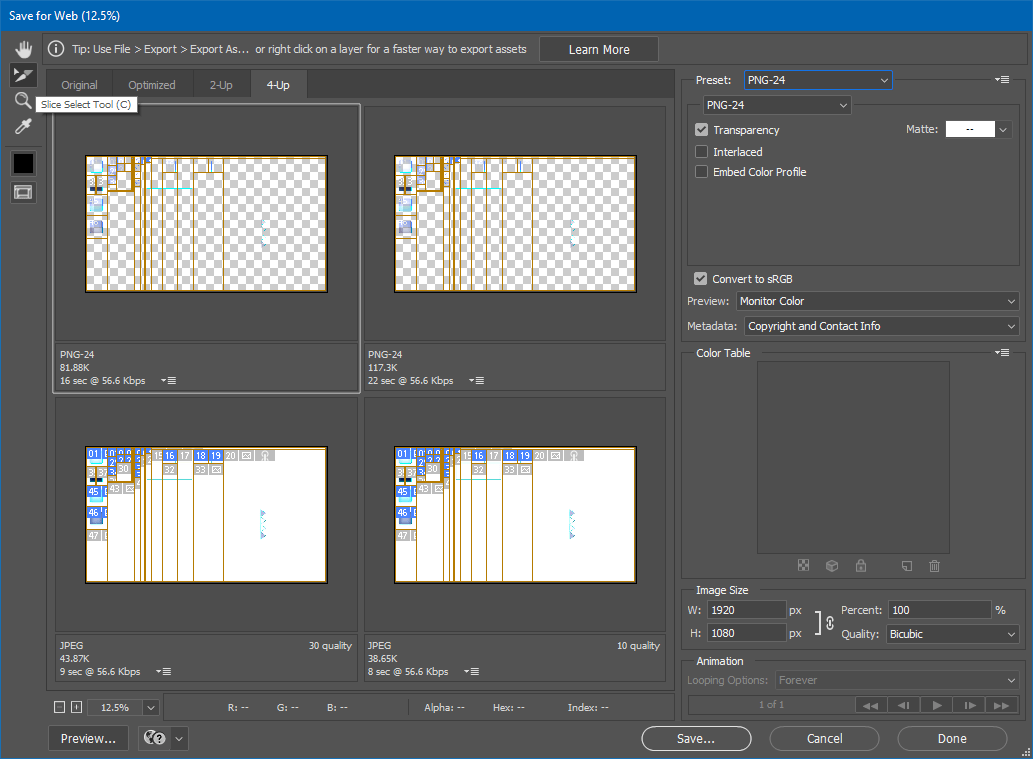
- If you add more slices later on, you may have to repeat these steps.
Saving
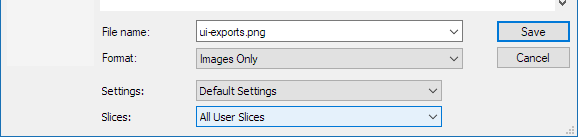
- Open the Save for Web dialog again and click Save.
- Make sure All user Slices is selected, this will export all the slices that you created only. The file name here doesn’t matter.
- Click Save and the slices should be placed in the selected folder within a new sub-folder called images.
Now you have a batch of nicely named and exported assets! Make sure all the exported images are named correctly, if not then you likely missed naming a slice.
Optional: Trimming excess pixels
This next part is optional but can be useful for assets with excess transparent pixels. You may skip it if all of your assets were sliced to the precise size that you need.
Avoid using this process with assets where you require uniform images like with various button states. If you trim the transparent pixels of these kinds of assets then you can end up with different sized images that may not line up correctly in-game.
Creating a trim action
Begin by creating a “trim and save” action in a new blank document:
- Open the Actions tab (View > Actions).
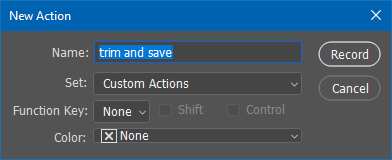
- Click Create New Action.
- Select the set to save the action in (e.g., “Custom Actions”).
- Name the action something like “trim and save” and then click record.
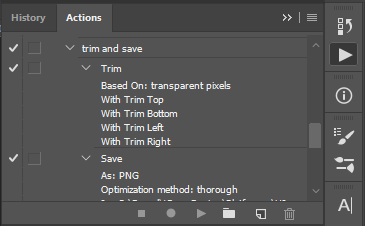
- Go to Image > Trim, select Transparent pixels and click OK.
- Go to File > Save As, select PNG, choose smallest file size, then click save.
- Hit stop recording in the actions panel. You should now have an action set that looks like the one below.
Batch process trimming
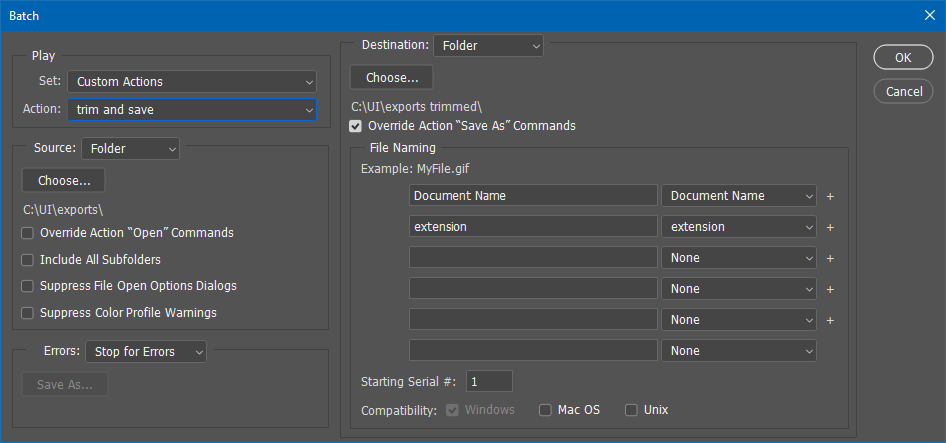
- Go to File > Automate > Batch.
- Under Play, choose the set containing your action.
- In the action drop down, pick the new “trim and save” action.
- Under destination, select Folder. This will enable the options below.
- Click Choose… and select a new folder to export the images in. I prefer putting it in a folder labeled “trimmed” that is beside the source folder folder from the slices step.
- Check Override Action “Save As” Commands.
- I leave the naming convention to Document Name and Extension, but you can customize it with any prefixes or suffixes if desired.
- Now comes the fun part–watch Photoshop handle the rest of the work! Sometimes you may get a popup that asks to trim the top left pixels instead. I just click cancel and then continue in the following pop up. This occurs when an asset has no transparent pixels to trim.
You should now have two folders: one with trimmed slices and another with your original slices. Occasionally, you may want to retain extra transparent pixels in certain assets for alignment purposes. In such cases, use the assets from the original folder with the correct dimensions.
Maintaining the files
With this process in place, file management becomes more straightforward:
- If you need to change an asset’s style, simply copy the new assets into the export atlas and apply the layer style to the existing asset used for slicing. This way, you won’t need to rescale the assets, making it easier to update the visuals.
- If an asset can’t be replaced by using layer styles, you may need to manually scale the new one, possibly using smart objects to assist. However, striving for a non-destructive approach with layer styles can help minimize such situations.
- Afterward, re-export the slices and rerun the batch process.
Extra steps for high-res screens
In today’s world of smartphones and 4K monitors, maintaining the UI at the intended scale is more complex. These steps can be valuable when exporting assets for screens with varying pixel density.
The ideal way to scale for multiple densities
The most convenient approach is generally to work at a 1X scale and scale up the UI, rather than starting at a higher resolution and scaling down. This avoids potential issues with layer styles and ensures smooth scaling. If you must work with higher scales, plan ahead to ensure clean divisions.
For example, if you need to create assets for 1X, 2X, 3X, and 4X pixel densities and initially work at 4X scale, you’ll need to downscale to 75% for 3X. However, downsizing can lead to problems like Photoshop rounding a 2-pixel stroke to either 1 or 2 pixels instead of 1.5 pixels, which alters the UI’s appearance. To mitigate this, artists must consciously be aware of compatible multiples when setting layer styles or positioning elements, which can be cumbersome.
Alternatively, exporting assets at the native 4X resolution as PNGs and later downscaling them may seem like a viable alternative. However, this can result in blurry lines due to off-pixel shapes, potentially ruining a clean UI. But in certain cases, like with textured or painted UIs, using higher-resolution textures may be the only option for smooth scaling and the textured look may help conceal imperfections along the edges.
In my experience, scaling up is usually preferable. Knowing that, I avoid using bitmap textures in my UI and instead rely on vector layer styles to achieve the desired appearance. Like Tribal Mania’s UI was entirely made out of vector shapes and layer styles apart from the background image.
I recommend discussing your team’s target monitor requirements from the project’s outset and adjusting your design process accordingly.
What scales to use?
- I like this resource for iOS device render scales.
- For monitors, you would simply want 2X upscale for 4K, 3X for 6K and 4X for 8K.
The upscaling processes
Thankfully planning for the upscaling is more work than the actual upscaling process with this UI atlas.
- Before exporting the slices in the Save for Web part of the guide, go to image > image size and set desired amount (e.g., 200% for 2X).
- Make sure resample is checked.
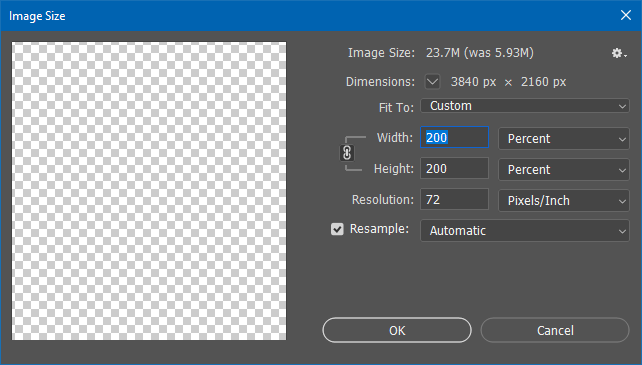
- Click OK and you’re done!
- Now simply follow the main export steps, and you can repeat this for various scales.
Concluding
That concludes this tutorial, thanks for reading! If you would like to see more game development related tutorials check out my other posts tagged #tutorial.