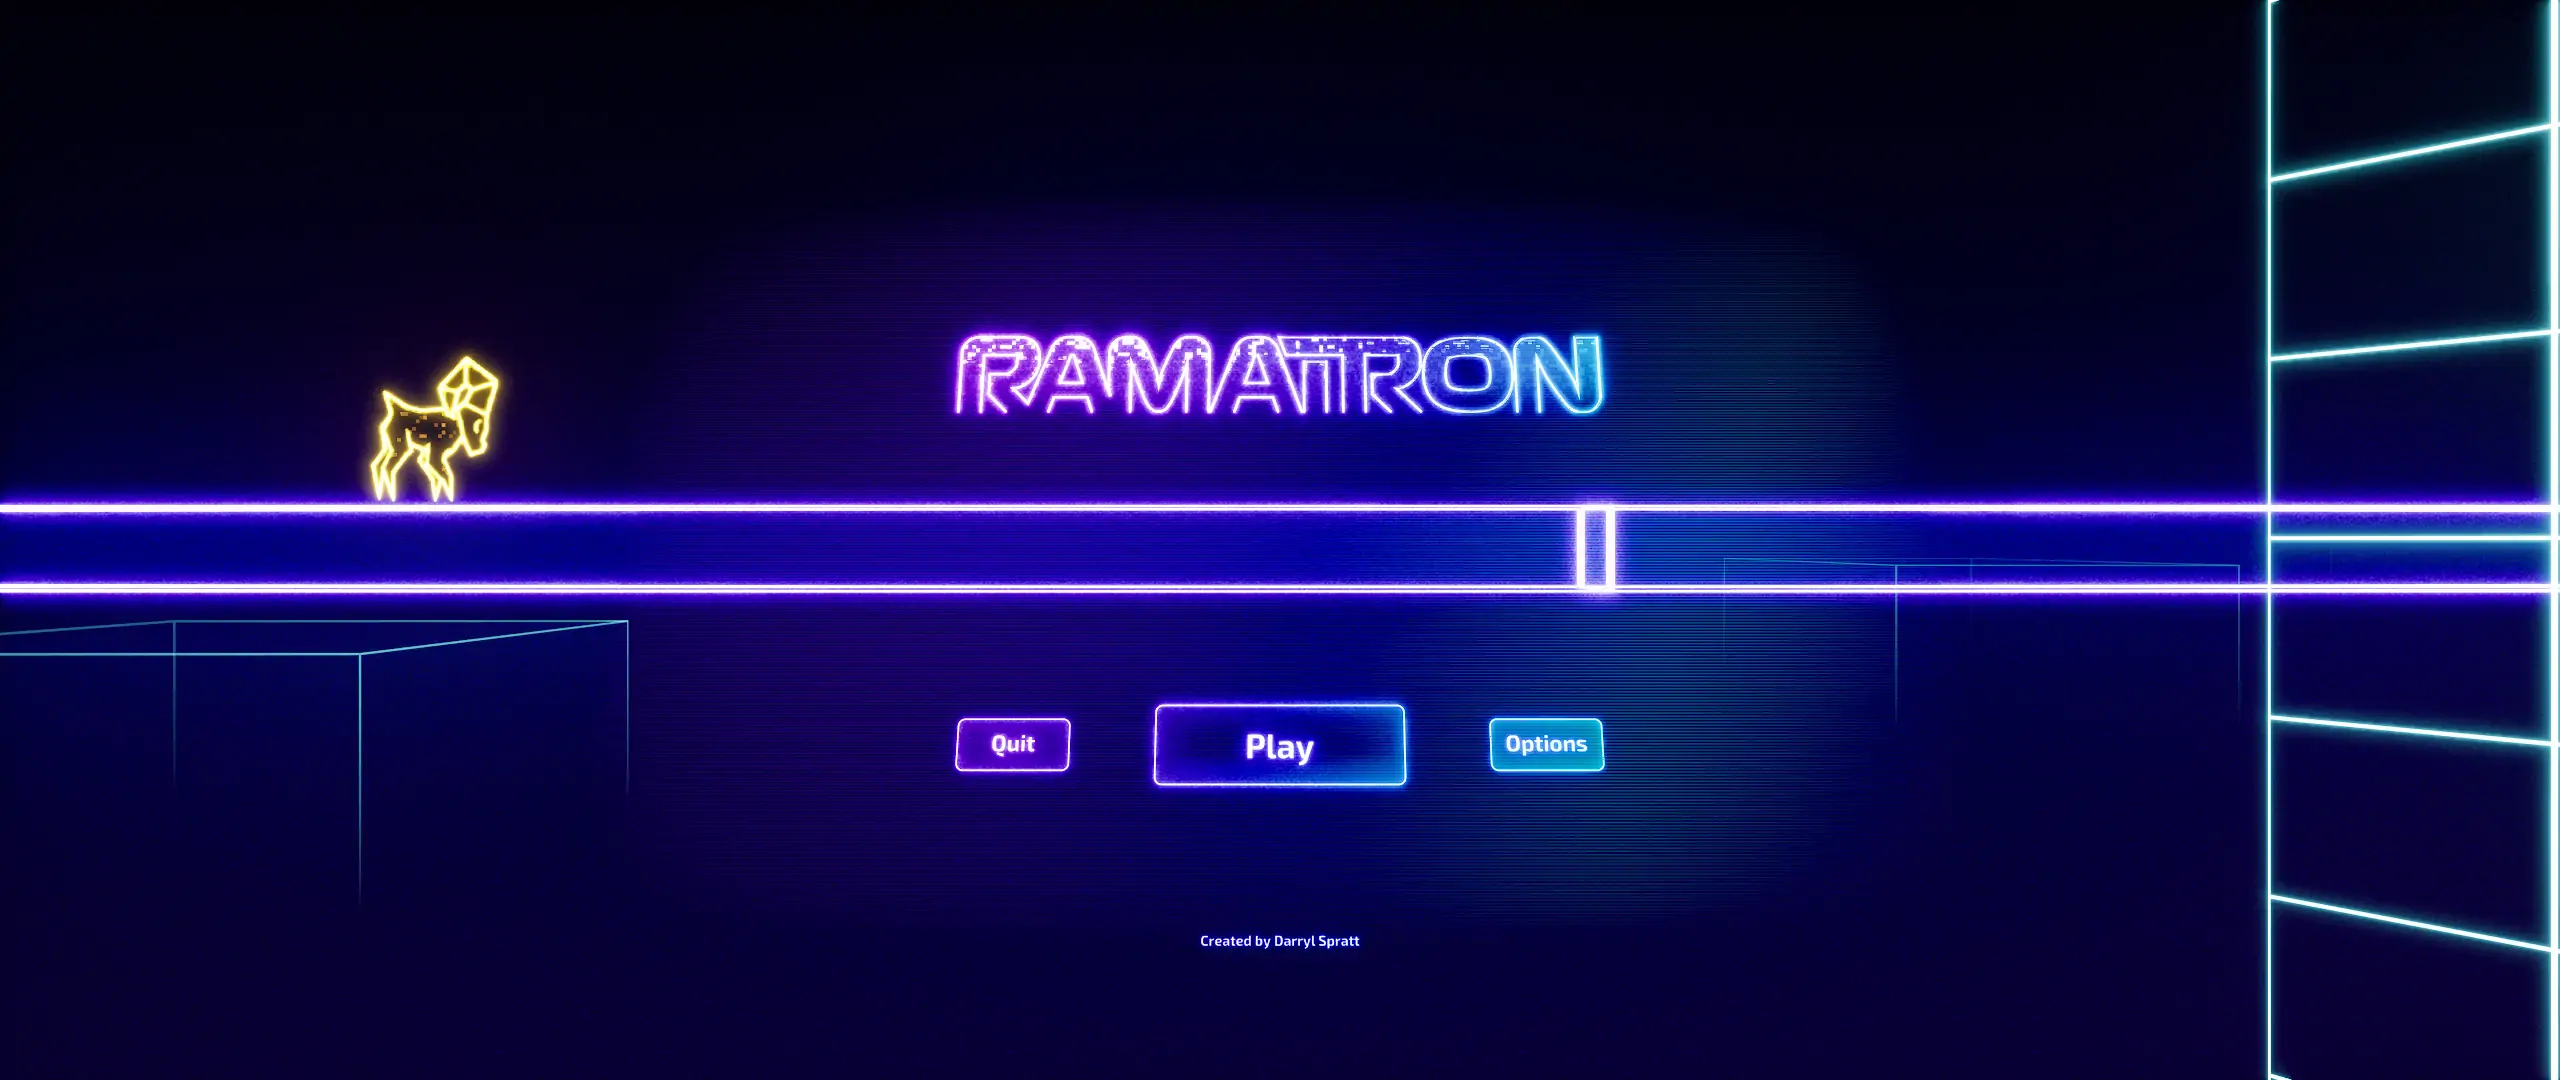
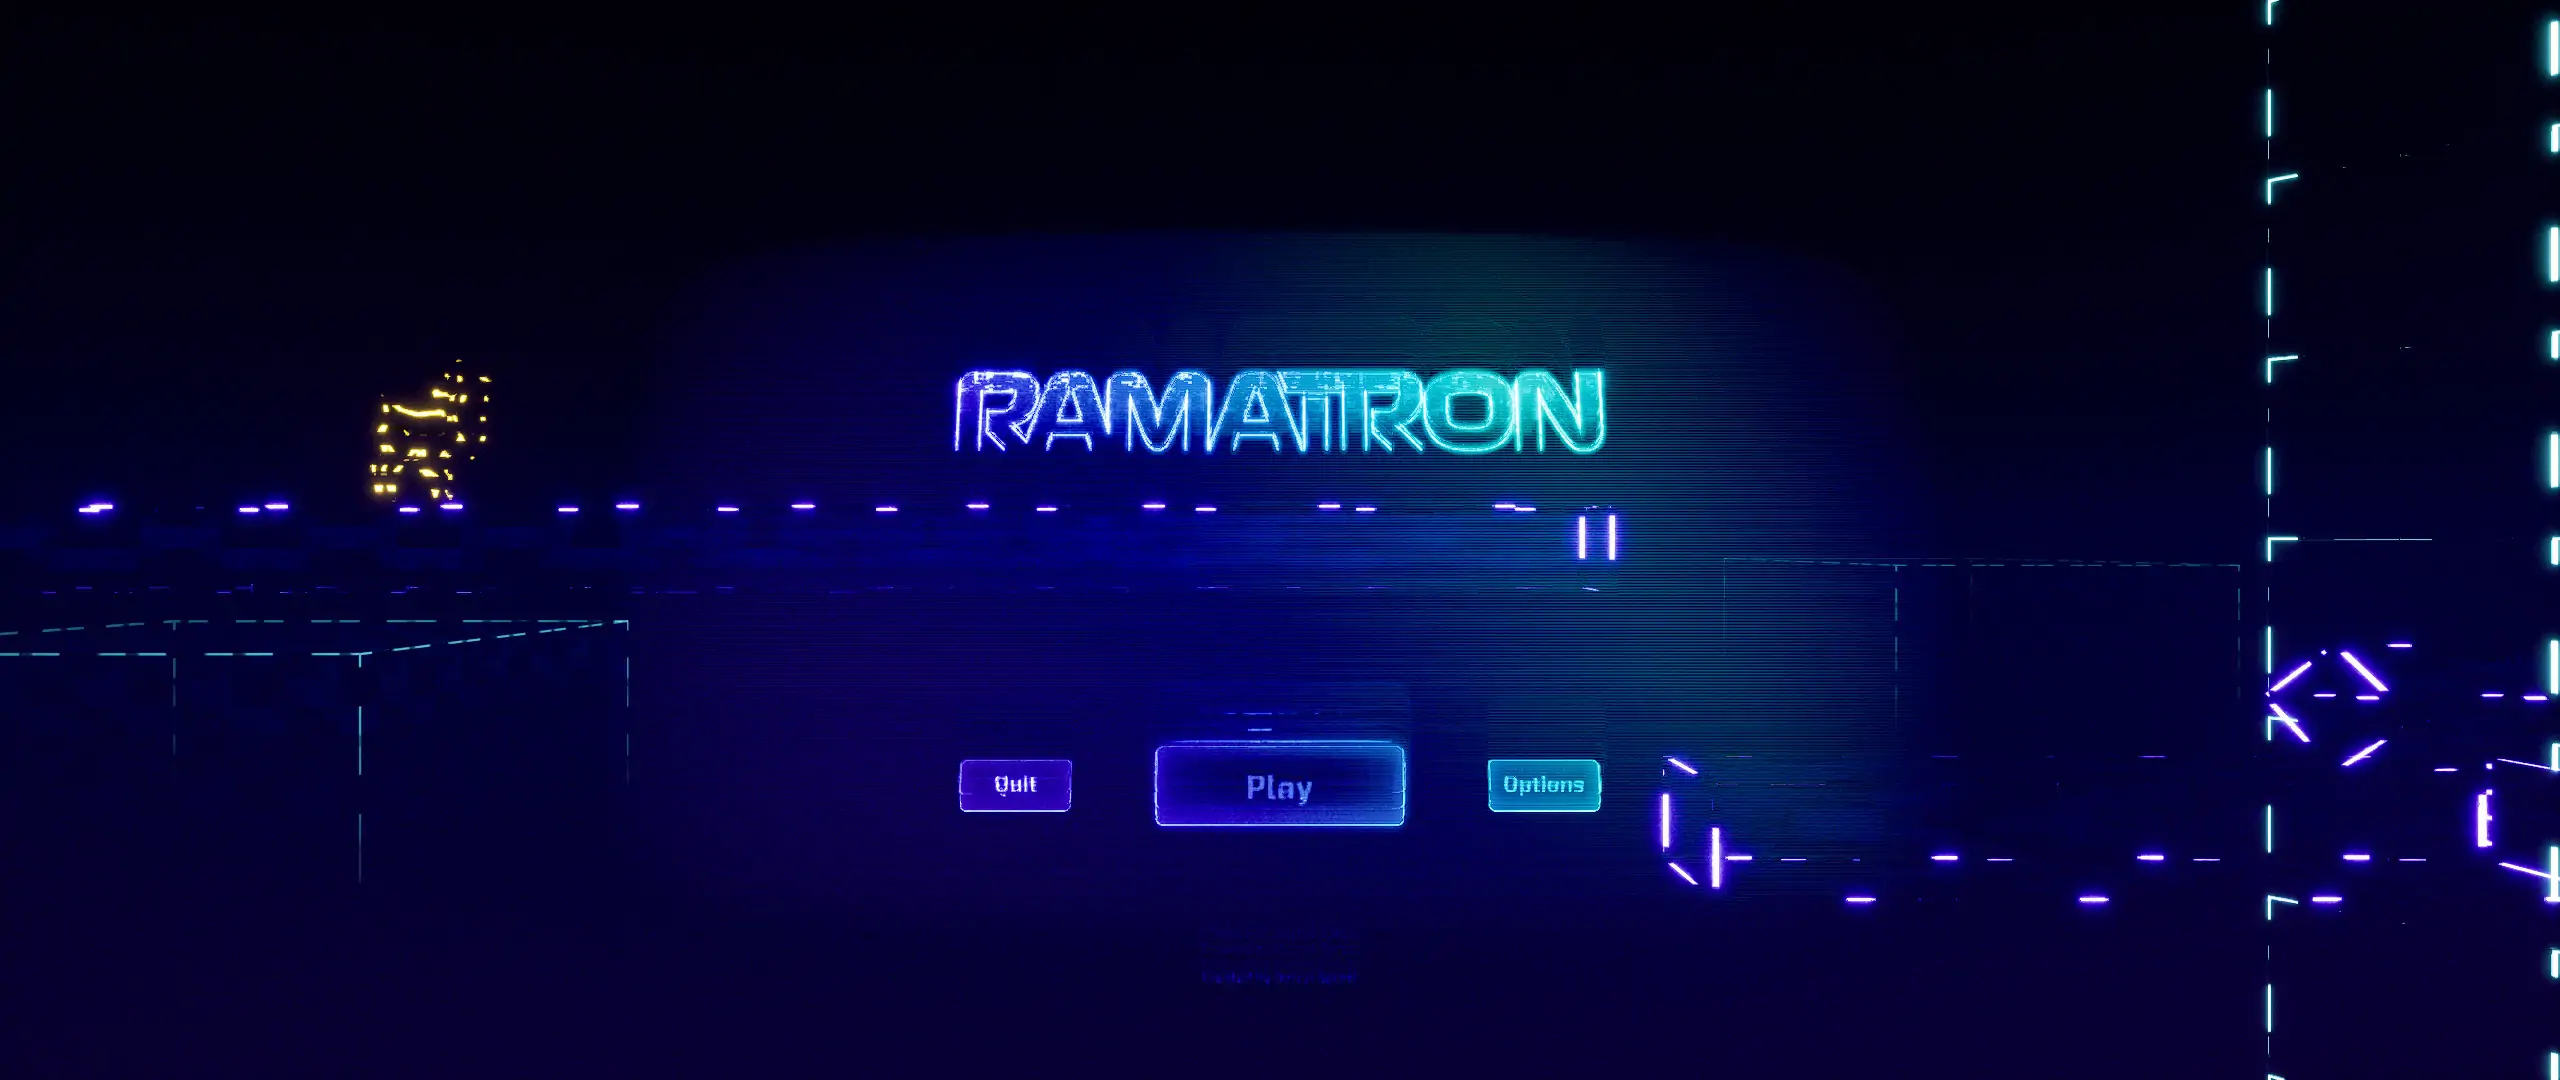
Since my last dev post, I created the user interface for my game, implemented temporary audio and also made a few gameplay improvements. I also decided on a name for the game: Ramatron!
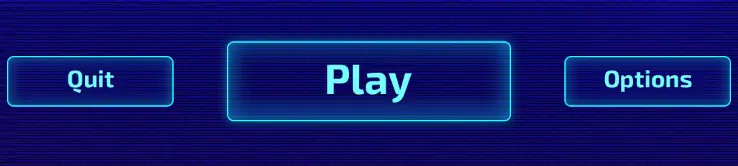
I wanted the user interface to match the neon glow visuals that the game took and seamlessly integrate into gameplay, so that the player can go another round without hassle. A key component of the look revolved around the glow effect that’s rendered in engine, which made it challenging to foresee the end result of the UI art. Finally, I wanted the UI to have a dynamic, arcade feel and incorporate the pixelated noise material effect from the game’s ram character.
Research and prototyping
To start off, I gathered inspiration from various sources, this included games such as Beat Saber, Cyberpunk 2077, Party Hard 2, Tetris Effect, Vctr-Sctr; posters of movies like Tron; and various images with a synthwave theme.
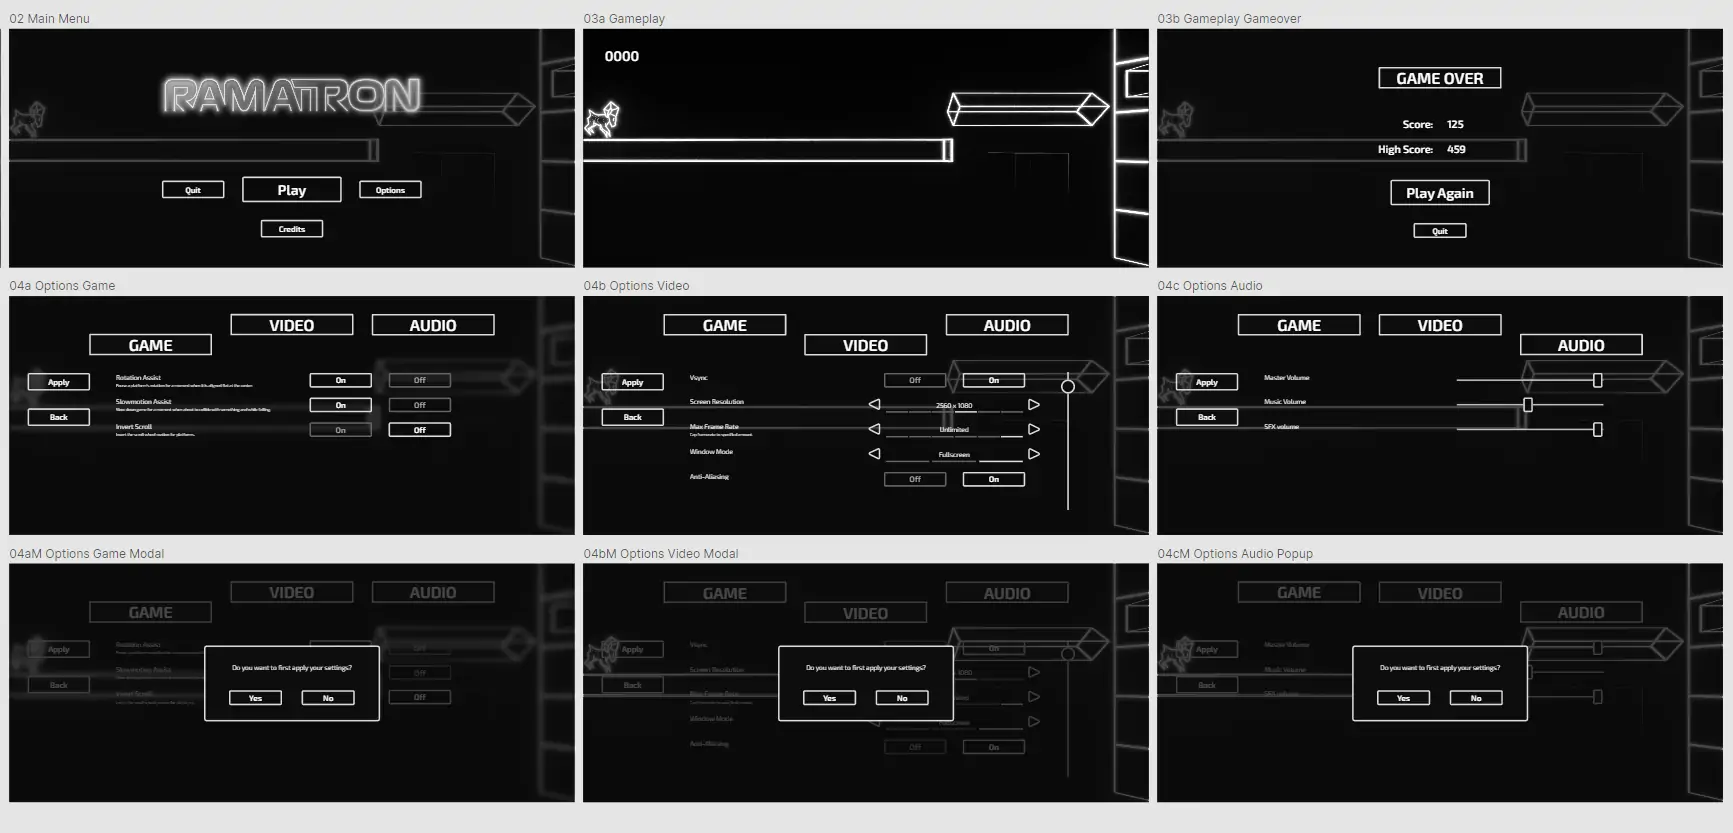
Next, I made a prototype using Lunacy, which is a free program similar to Adobe XD or Figma. With it I made all the necessary screens, only focusing on the layout, so the images were all kept in black and white while using minimal detail.
This prototype helped breakdown the necessary screen styles I’d have to create. Since the game’s quite small, only 3 different basic screen styles would account for the entire UI.
Creating the 2D art
Designing the logo
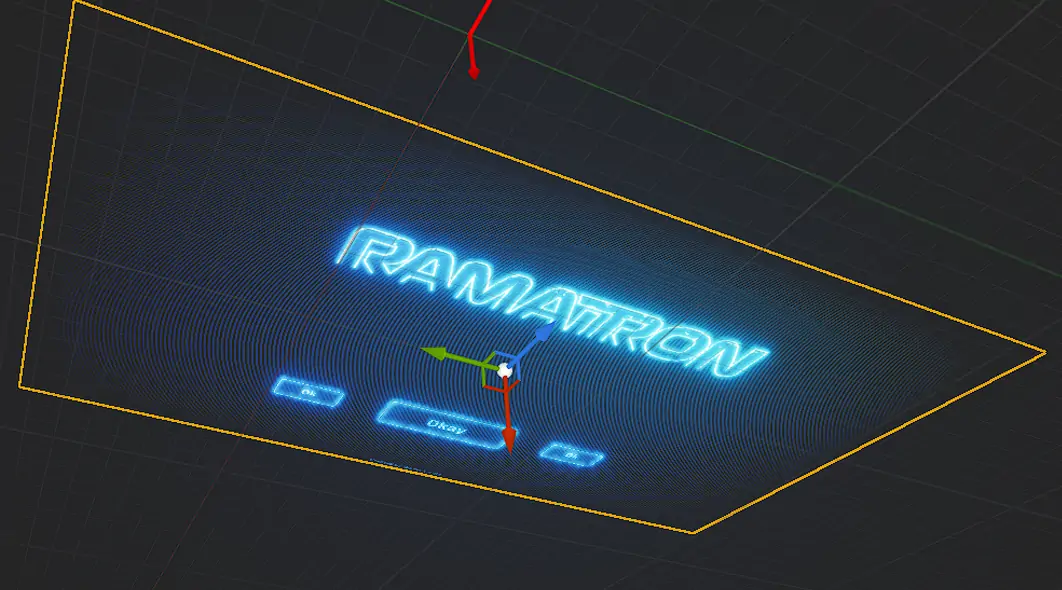
The logo was an early part of the art design as I usually like to use the logo as the cornerstone for the game’s identity. Using glowing borders for the letters was an obvious choice, whereas the interior of the text was more challenging to settle with. I wanted to make this logo dynamic in the game, so I went with two different versions of the logo, one that looks good statically and a separate one for in game.
The dynamic aspect made it more complex to predict the outcome of the logo in game as much of the style was achieved with the material editor in Unreal while the actual logo texture used was very simple. Thankfully, my prior work with the ram character material gave insights on how to accomplish what I wanted.
Making the UI art
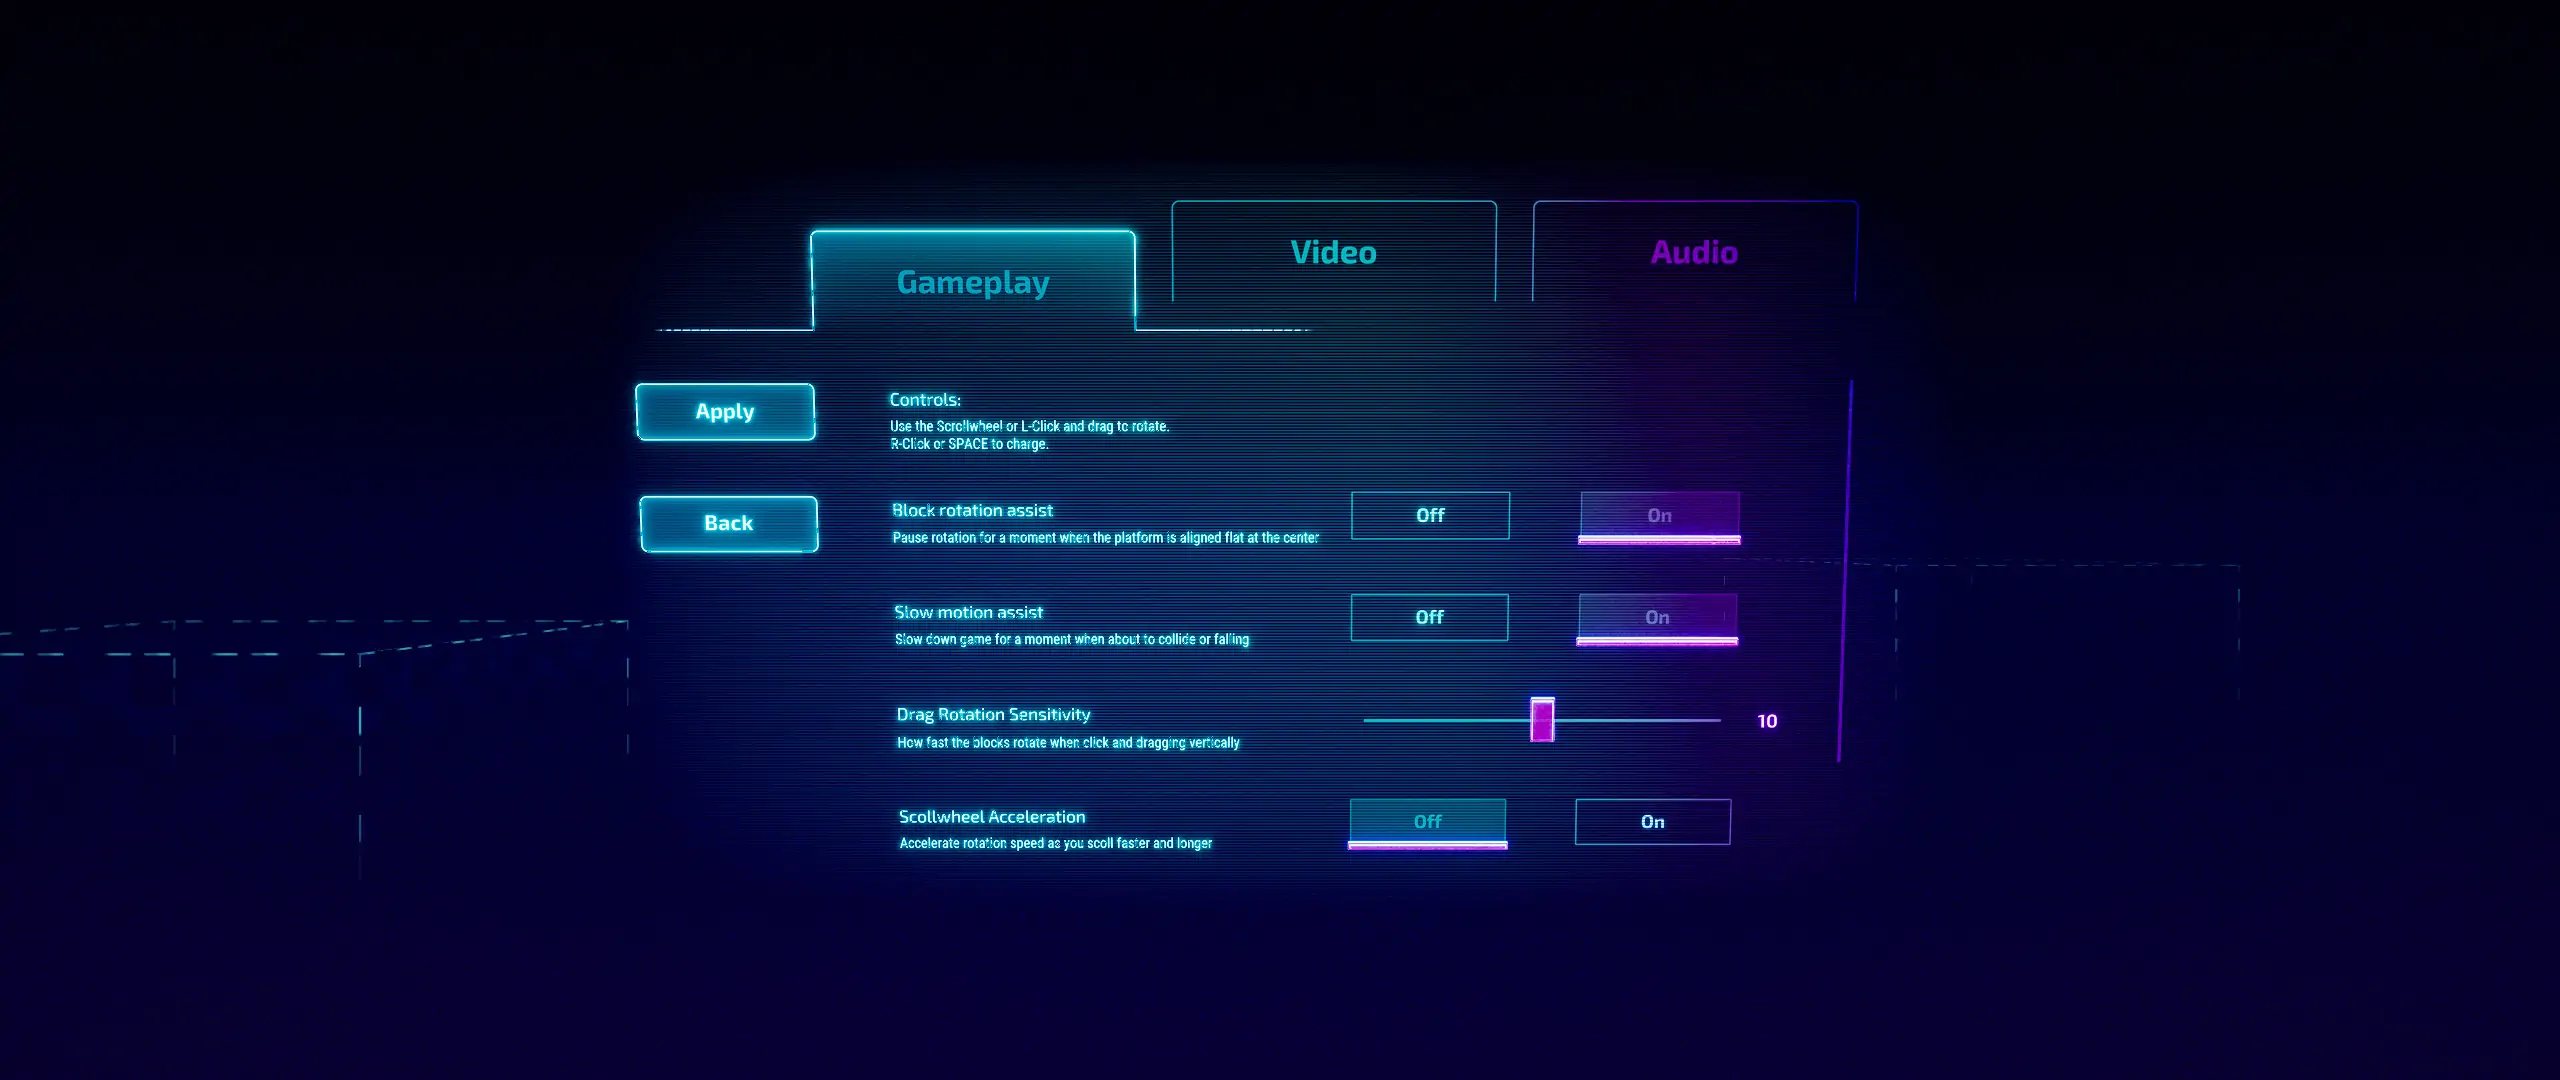
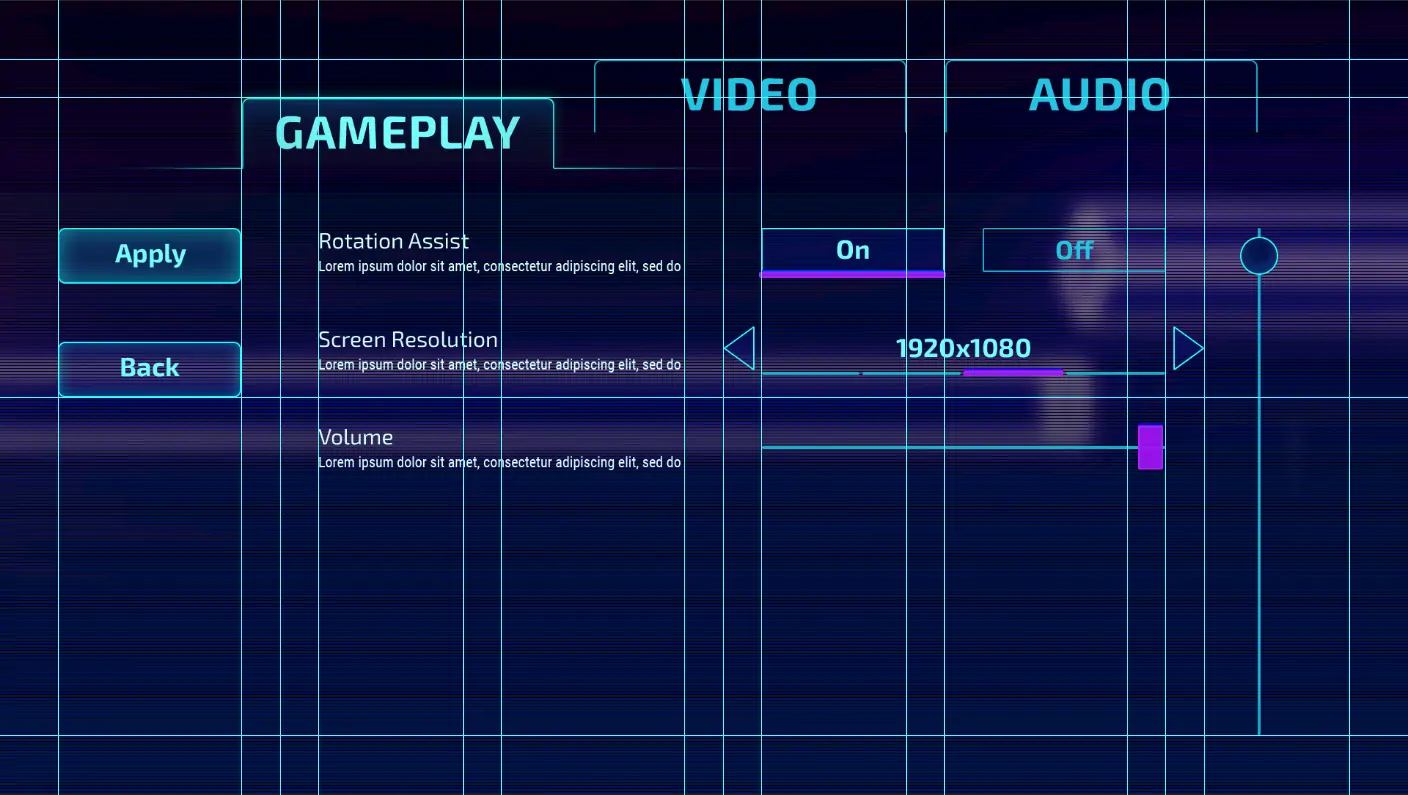
I began crafting the UI by planning a UI grid, but I didn’t want the UI to have too much of a grid look. To solve this, I used a grid with alternating column widths and also shifted some elements off to another portion of the grid, like the tabs.
Given that game UIs stretch based on monitor sizes, it’s crucial to consider the grid’s role in the UI scaling and plan for it to be able to squish or stretch accordingly. The fractions of the grid developed here was later used with the Grid Panel widgets during implementation in Unreal.
Implementing the interface
Implementing this UI was quite a different experience than others that I worked with because of the style requirements it had.
Initial work and challenges
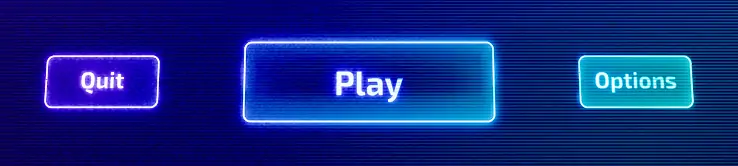
As I mentioned before, the key to the neon style was to use Unreal Engine to render the glow effect. This provided some challenges because in order to achieve that look, the UI had to be rendered in 3D space, as it would be impossible to make a comparable effect with just textures or materials rendered to screen.
The main issues were that the 2D UI art will not match the end user’s view and that the UI wasn’t easily stretchable due to being on a 3D plane actor.
Problem 1: 2D art
The first problem could only be solved with iteration and good guess work from my previous experience with the game art.
- I had to make the assets in Photoshop to be simpler and much more muted glow effects.
- The logo was most complicated where techniques were used to generate the noise effect on parts of the logo while having the rest match with the other assets.
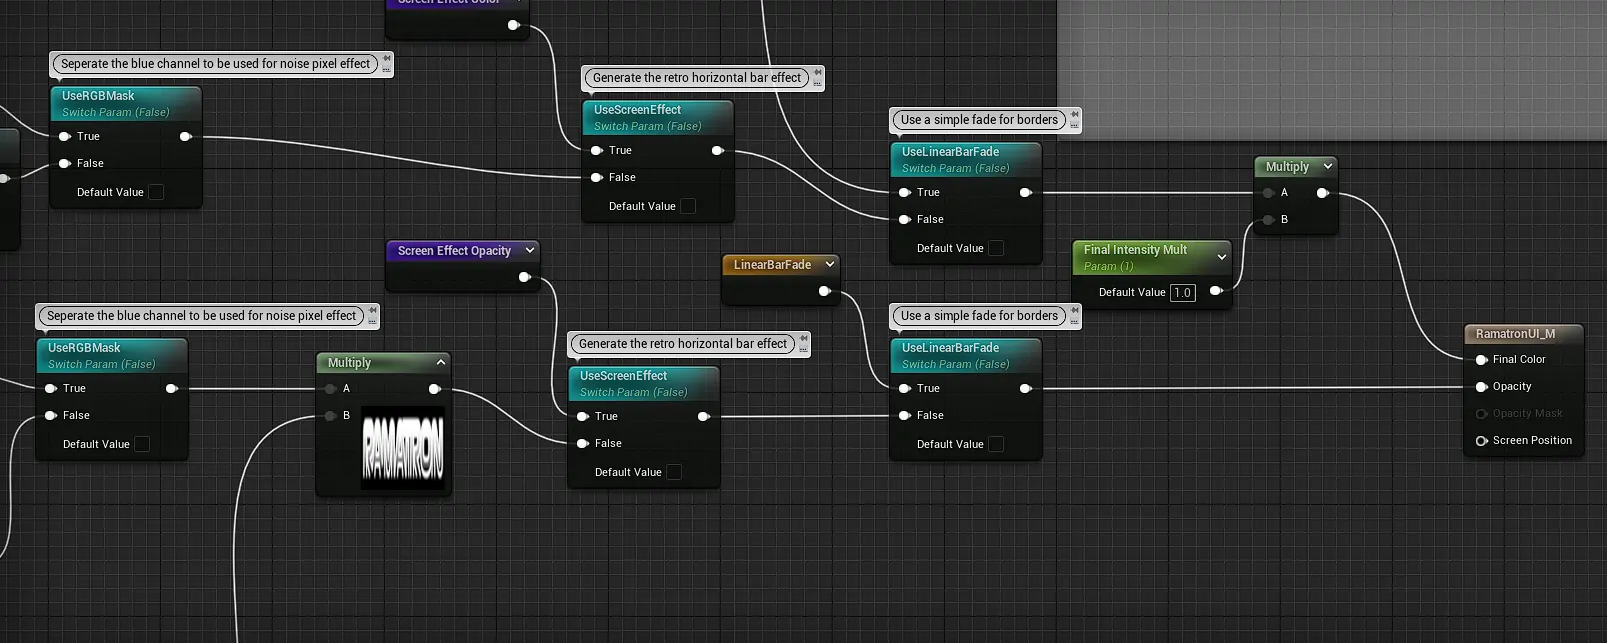
- I built the UI material with many different parameters to play with to make this easier. Things like color, glow intensity or transparency could all be tweaked in the material instance.
If Nodes were useful to help break out and filter what I need while still trying to allow for the border around the text to show through.After finishing the core aspects, I decided to take advantage of this more generative approach with the UI art by adding even more dynamic effects to it, the most prominent being the graceful gradient effect that pans around the whole UI or the scanline effect that appears behind popups.
Problem 2: World space UI
Part of the solution of problem 1 was to make the UI in world space, however this meant that I couldn’t utilize the auto-scaling of the UI for the screen.
- As a solution, I put the UI on a static 3D plane that will be small enough to fit any supported screen size, yet large enough to be legible.
- Getting inspiration from other games with 3D interfaces, I added some character to the menu with a subtle tilt and rotating it in and out between screen transitions to tie into the block rotation gameplay.
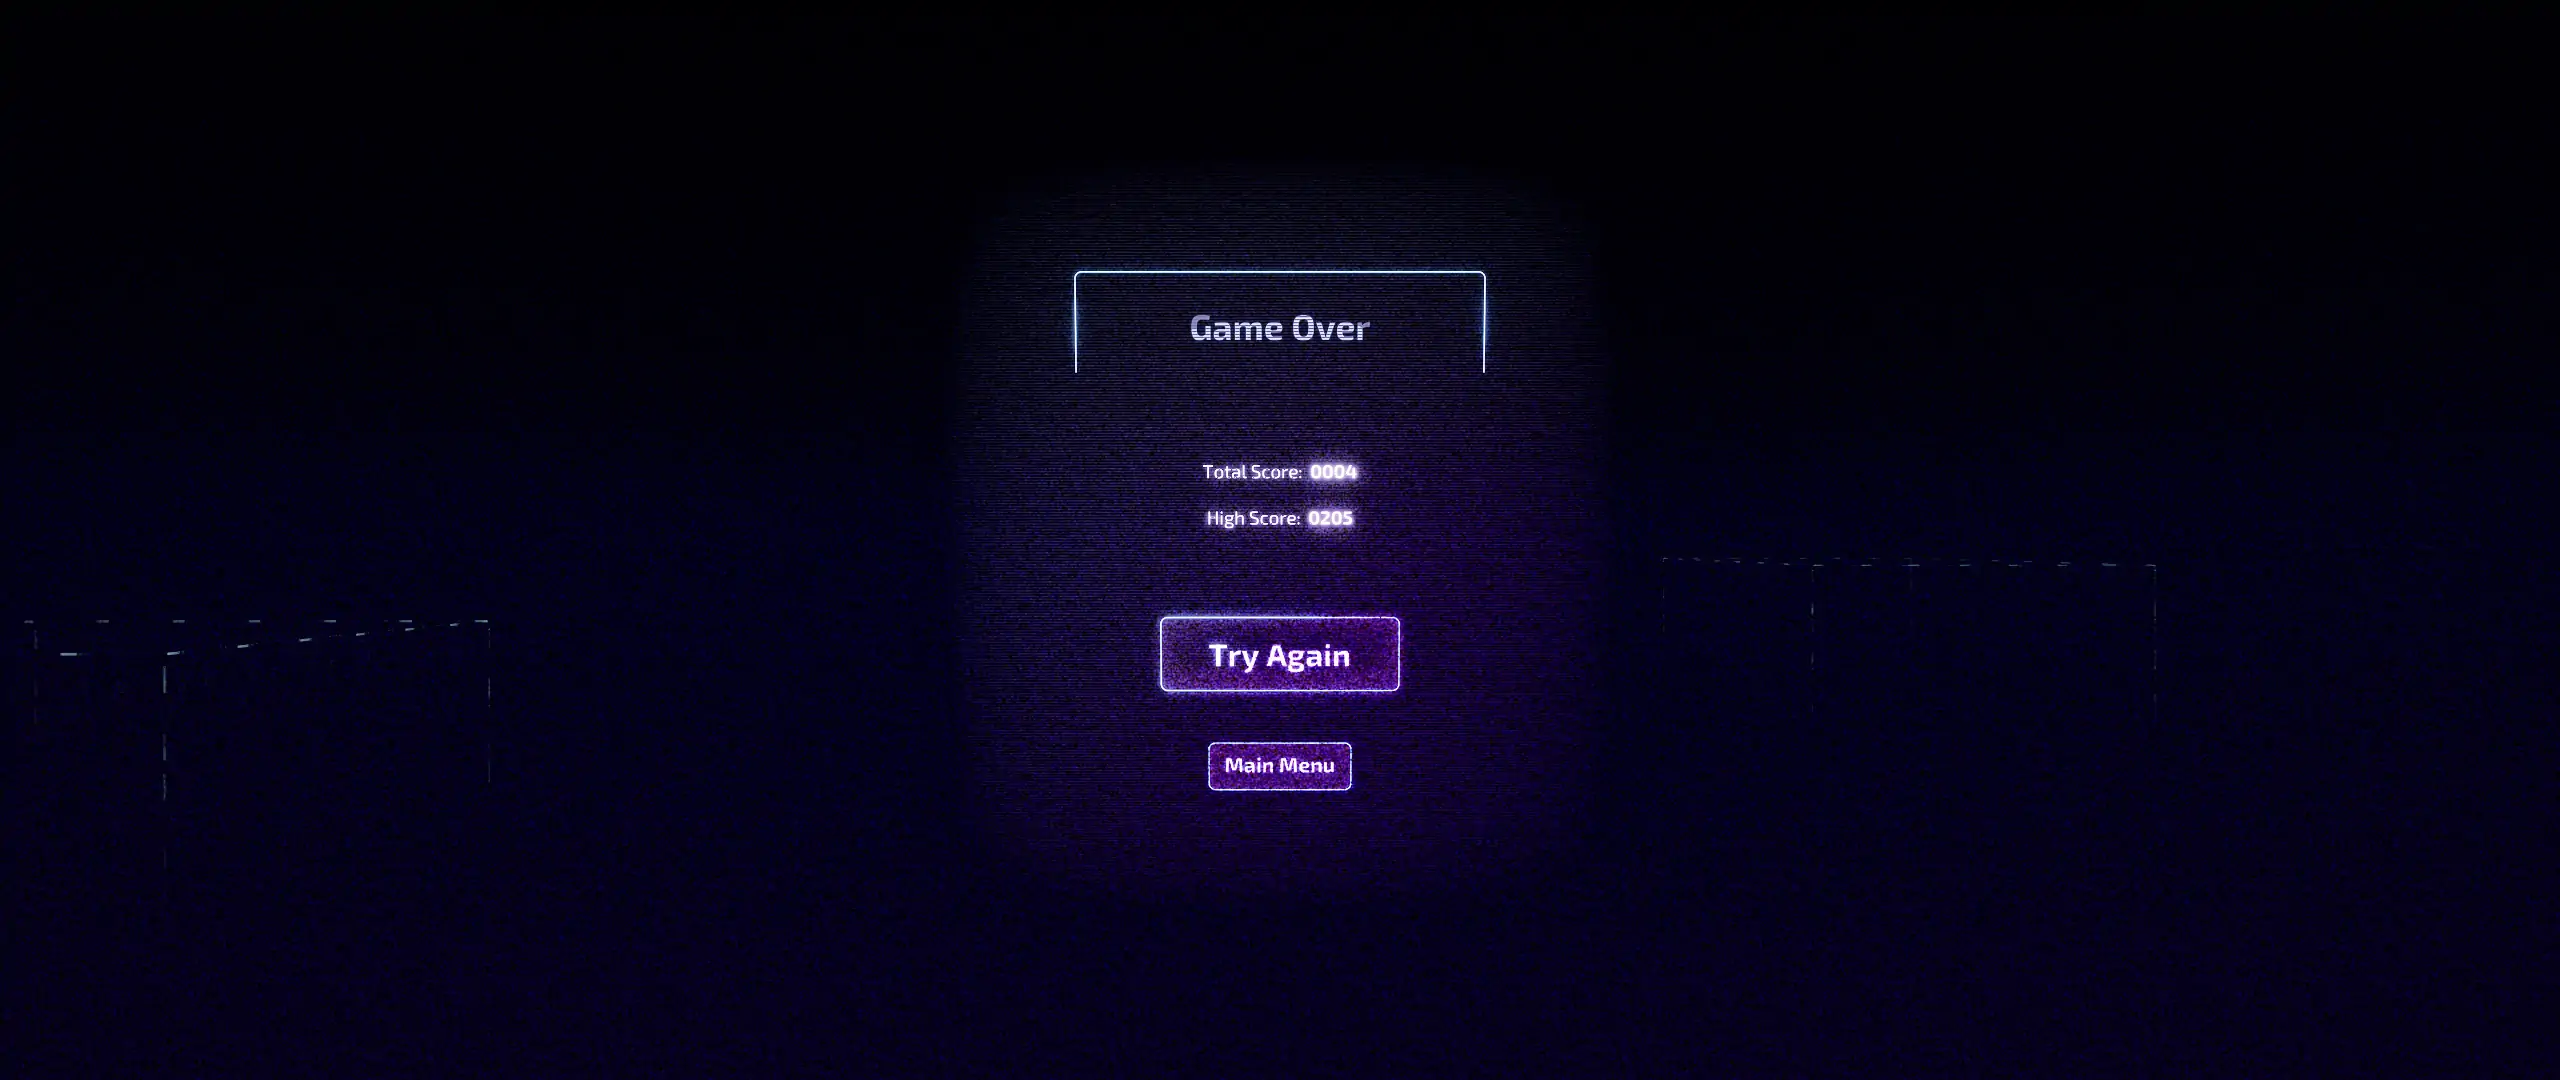
Overall, this made the UI feel like it is part of the game and allowed for seamless transitions to the gameplay.
Optimization
I wanted the UI to use as few materials as possible and ended up with one material for the UI widget and a second material for the in-game UI plane. Taking advantage of switch parameters in the material editor allowed me to heavily customize the material so that I could have different effects on the logo that don’t show up on the rest of the UI. Having the whole UI under one material also allowed the gradient effect to work by panning across all assets as if they were one.
Polishing with the background art
The additive transparency of the UI posed some clarity issues with the glowing blocks in the background as they would shine right through the menu and make it hard to read. I wanted to keep the transparent look of the UI though, as that was critical to the style. As a solution, I made a transition on all the blocks and background assets to dissolve them away when the menu popped up. Using event listeners and dispatchers was very helpful here.
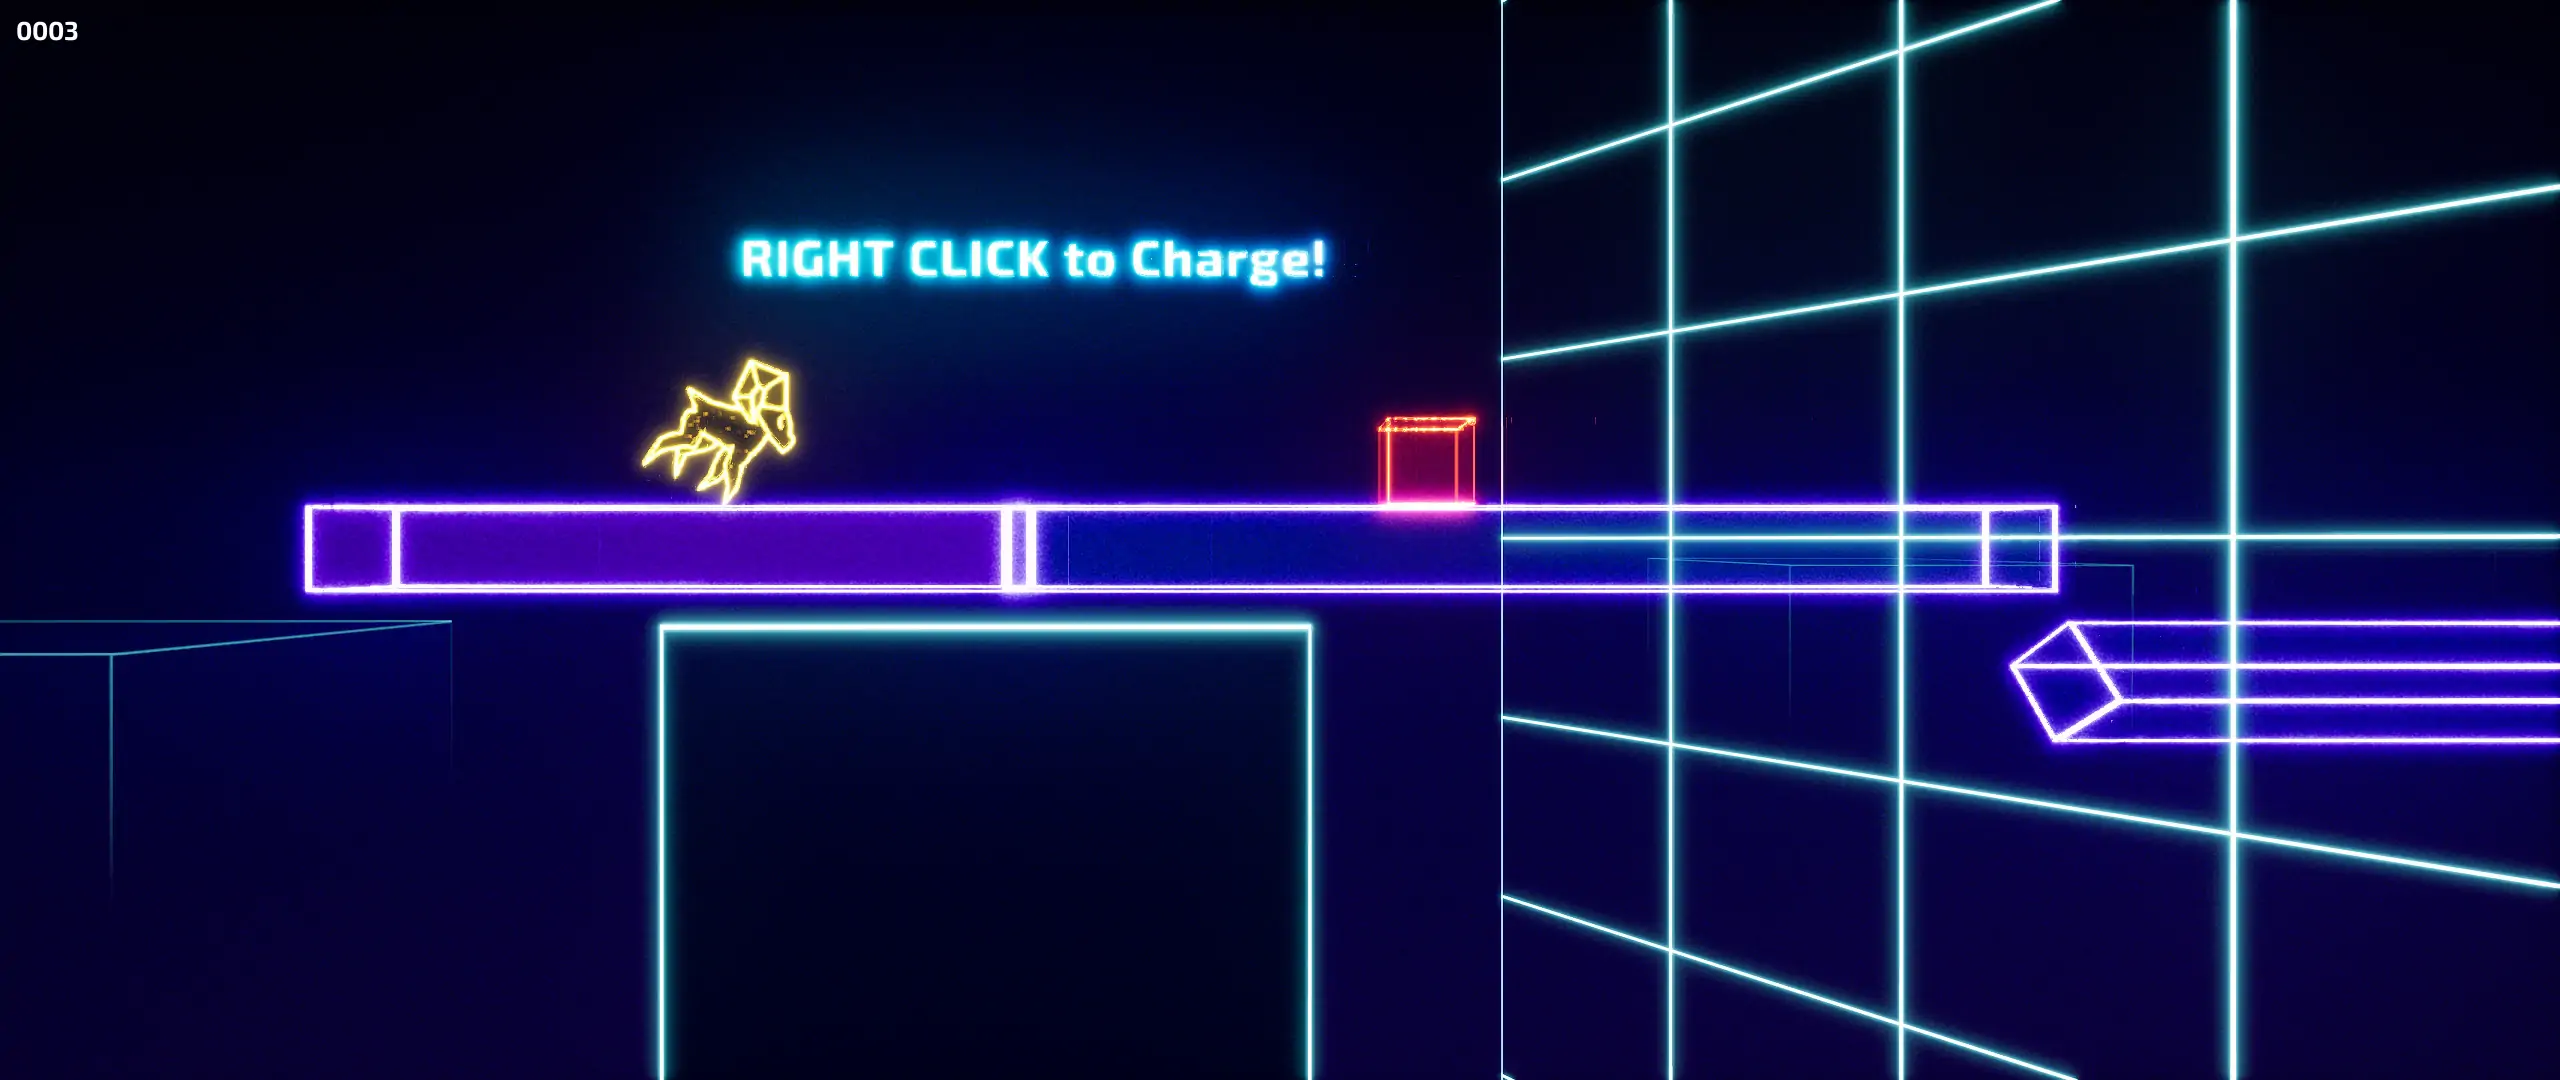
Dynamic tutorial
The final piece to implement was a tutorial that teaches the simple controls to use in the game. I made it so that this tutorial pops up only when the player’s high score is below 20. It’s a custom block sequence that I designed to be very easy and progressively introduce new ideas and challenges to the player while seamlessly flowing into the main game once completed.
HDR Support
A little bonus thing that I think is neat because I don’t see it implemented well in most games is HDR support that not only has support in game but the HDR works for the UI too. This was very easy to do because the UI colors are generated from materials rather than set texture colors.
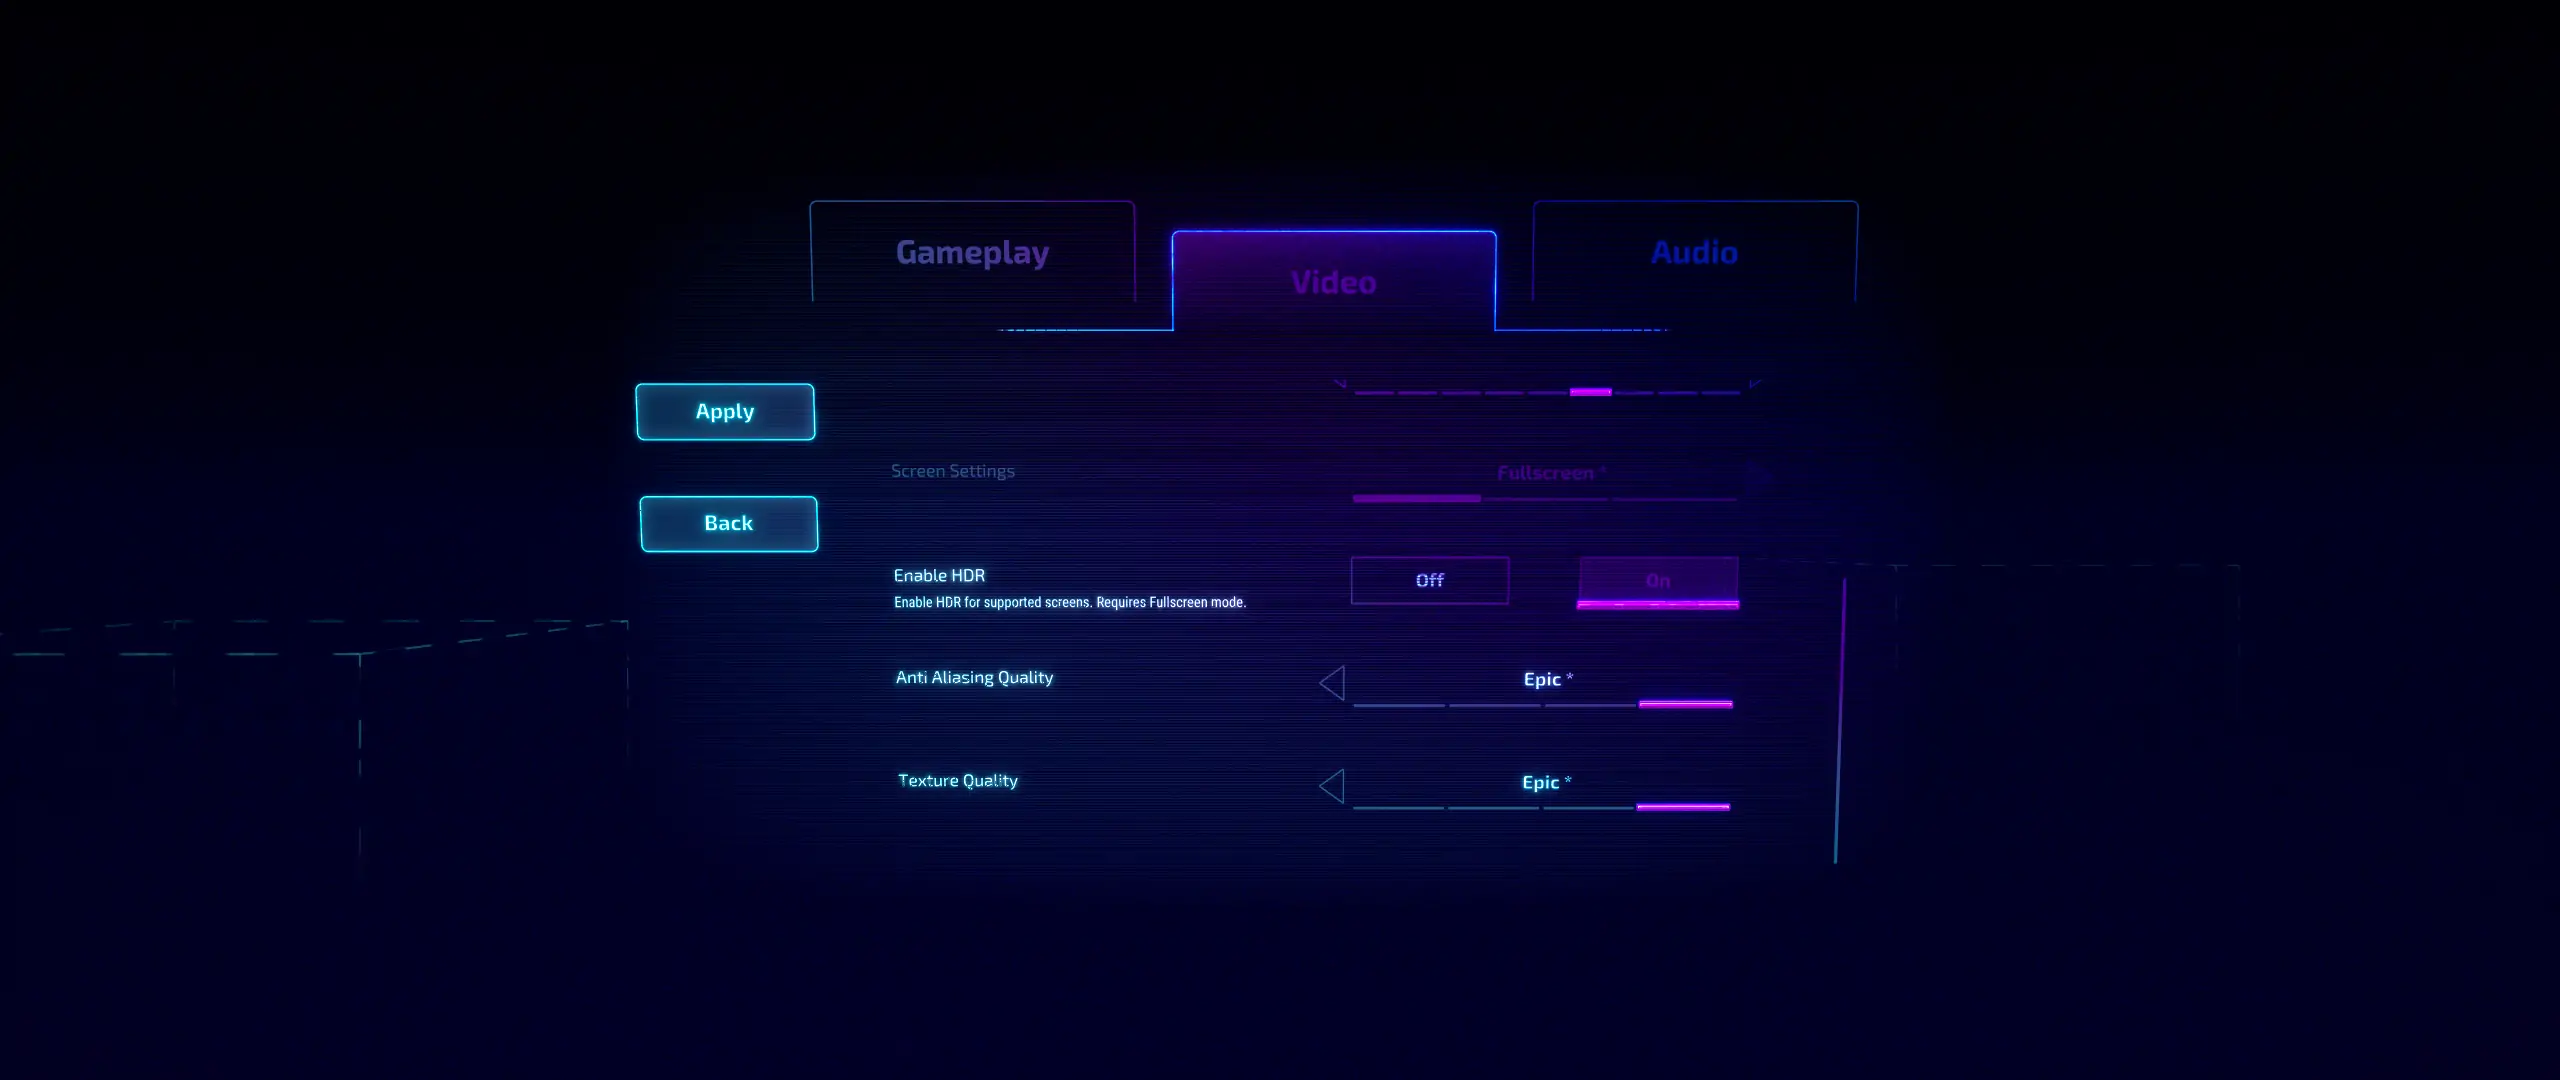
If you want to see the real HDR image you have to download the image from the link above. It’ll only look correct if you have a HDR monitor and have HDR enabled in your OS. Also some computers may not support JPEG XL files. Hopefully one day HDR will be more universally supported!
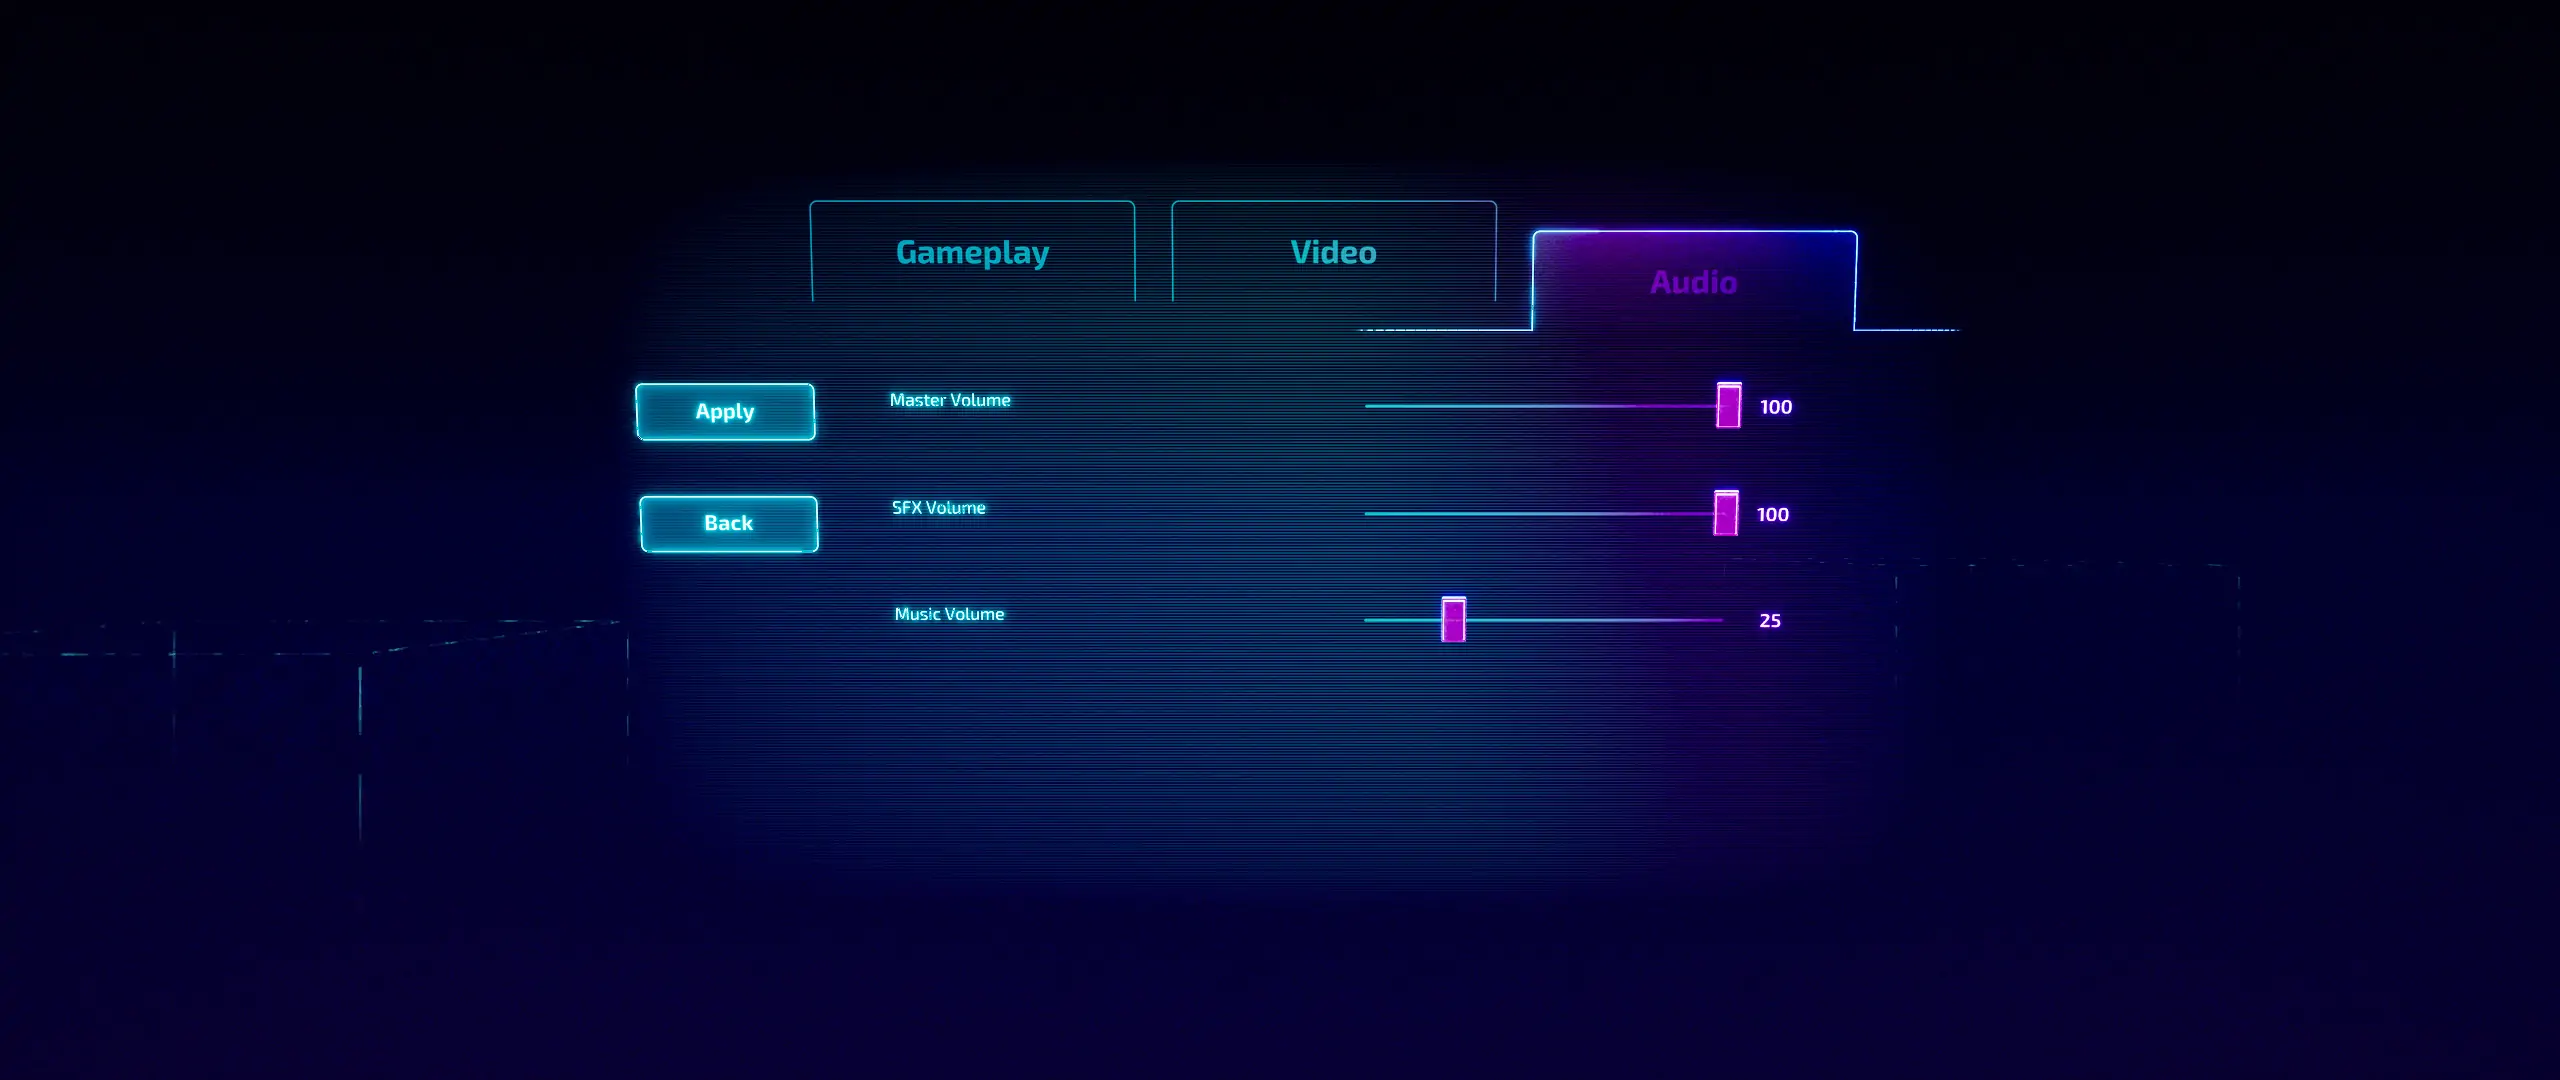
Sound Effects
For temporary implementation of the audio in the UI, I made some quick sounds and used more audio assets from Gravitos, the student game I was part of where my brother made the SFX and music. This was important for the finishing touches of the UI and the end goal I have for the audio is very similar to what’s in the game right now.
Concluding
With the UI finished the game is getting closer to a release. I’m still figuring out what platform to release on and also want to get more playtesting feedback. I’m also considering this game as a VR game for Apple’s new headset if there can be an intuitive way to control the block rotation, if executed well I think the 3D glowing objects would look pretty cool in VR.
I wrote some tutorials while building the UI that gives more details on how I made it. The first is about making a Stepper Widget while the other gets into my exporting process in Photoshop plus some ideas to speed that up. Check those out if you’re interested and thanks for reading!